Legend of Aeon

Wednesday, August 28, 2013

Clash of Clans- Witch


Want to be involved in creating a mobile phone MMORPG? Check out my other blog here

Check out other Dark Elixir Troops here Summary
 

  • The Witch is a powerful troop that can summon dead warriors from past battles (skeletons). She is used as a support troop (similar to the way the Healer works) and when used correctly, can wipe a battlefield with ease. 

Offensive Strategy
  • As she has low hit points, the Witch is recommended as a support troop, and should be placed near the back of an attack. Don't group Witches together or a Mortar may wipe them all out. The witch has a longer range than an Archer or Wizard, so she can fight behind archers without being attacked. Plus the witch's skeleton are good tanks to attract the attention of defense buildings.
  • Drop a couple of Giants as distractions, with a few Wall Breakers shortly after. Then add 1-3 Witches and they will spawn skeletons to help the Giants. When the Giants and Witches finish destroying the defenses, drop 1-4 additional Wall Breakers (depending on level) along with 1-4 Witches and moreGiants.
  • The Witch's skeletons can help Giants destroy buildings.
  • The Witch's skeletons can easily overwhelm defenses, though splash-damaging buildings (Mortars andWizard Towers) can wipe them out just as easily as they can be raised.
  • If you have strong enough Lightning Spells, take out one or two Mortars at the start of the raid. This will greatly decrease the base's splash damage capability. More skeletons will then stay alive longer acting as a distraction for the defense and will let your stronger troops take care of the rest.
  • If you see a Witch on defense, a single Lightning Spell is a convenient option to prevent wave after wave of skeletons continually distracting your offensive troops.
Defensive Strategy
  • When using Witches as part of your Clan Castle complement, place the Clan Castle behind walls to protect her from being drawn out and killed easily.

Upgrade Differences
  • Currently, the Witch has the fewest available levels of any troop (two); every other troop has at least four, and most have five or six levels. It is highly likely that Supercell will add more levels in future updates.
  • There is no difference in appearance between the two levels. Currently the Witch is the only troop with no upgrade differences.

Trivia
Check out other Dark Elixir Troops here
  • The Witch has approximately the same amount of health as a Wizard of similar level.
  • Although she appears to have no feet, which makes it seem like she is levitating, she is actually aground troop and will not be attacked by Air Defenses.
  • In terms of health and damage output, the skeletons that the Witch summons are slightly stronger than a level 6 Archer. However, the skeletons have no ranged attack.
  • You can have a maximum of 20 Witches at one time in a full complement of fully upgraded Army Camps. This number increases to 22 if you include the 2 that can fit into a upgraded Clan Castle.
  • Only a certain amount of skeletons can be on the battlefield at the same time (see table below for details). 
  • Although summoned skeletons look very similar to Wall Breakers, they are more likely to be Barbariansbecause they have a similar look, stance and attacking style.
  • If you observe carefully, the Witch looks similar to the Archer, only much more "zombified".

Want to be involved in creating a mobile phone MMORPG? Check out my other blog here

Tuesday, August 27, 2013

Nimble Quest- Tips and Tricks

Want to be involved in creating a mobile phone MMORPG? Check out my other blog here

Tips for Playing Nimble Quest


There are certain tips and tricks that can help you win more often in Nimble Quest. This page lists some tips that might help.

Tips and Tricks

  1. If you kill the first enemy in a line of enemies, the entire line will be killed. Similarly, if you kill the second enemy in the line, the second and third enemies will be killed.
  2. It can be helpful to aim for the head of lines of enemies, but keep in mind that the leader of your party will be more vulnerable to the attacks of those enemies. Sometimes it's better to attack from behind.
  3. Don't be greedy: if you don't need a powerup or gem, you might want to leave it alone. Getting the powerup or gem could lead you into a group of enemies that will defeat you.
  4. Try different positions and formations. Sometimes it works well to loop around the center of a playing field and keep your enemies stuck to the edges. Sometimes it's better to stay in a corner and clear away the enemies in that area before moving on to a different corner. And sometimes it is good to stay in a long line that weaves back and forth.
  5. If you stay in the center, it is a little more likely that an enemy will drop a bomb in the center, which will get rid of more enemies than a bomb dropped near the wall.
  6. In the early stages, stay near the center, only going far enough to see the edge of the playing field before turning. This is the most efficient way to search the whole playing field for enemies. In later stages, the playing field may be too crowded to allow you to stay in the center.
  7. Be careful with the speed buff. Going more quickly lets you defeat more enemies in a shorter amount of time, but it can be harder to control, so you might find it harder to avoid crashing into walls. Also, when the playing fields get very crowded (such as in Courtyard 2 and beyond), the speed buff can make it more difficult to avoid hitting enemies. You can't turn the speed buff off once you have it, so beware!
  8. When your leader has a shield, the shield will disappear if the hero crashes into an enemy, but the enemy will be killed. Also, if the leader has a shield and crashes into a wall, the shield will disappear and the hero will turn left or right, surviving the crash.
  9. If you get a treasure chest but no magnet, go toward red gems and blue gems to get the best value from the chest.
  10. To survive the later stages, your group needs to have a high damage per second, so be careful to minimize deaths of the heroes following you. Always collect potions. And avoid stepping into large groups of enemies if possible, where it's likely that you will lose many party members as enemies crash into them. Try to weave back and forth to keep all of your heroes closer together. This way your attacks will be concentrated to a smaller area, enabling you to more quickly kill the nearby enemies.
  11. In later stages, try to eliminate healers, bats, and rats as soon as possible. The healers make it take longer to kill enemies, which can be fatal because so many enemies are spawned in such a short amount of time, making the playing field dangerously crowded. Bats and rats should also be dealt with quickly because they make it much more likely that you will lose some of your heroes when they crash into your line.
  12. Heroes can be leveled up instantly if you tap the plus star button to the right of the hero's stars and pay the specified amount of gems. The level up cost is reduced by 2 gems for every enemy that that hero defeats when that hero is the leader. To level up your heroes as quickly as possible, focus on leveling up one hero at a time and keep that hero as your leader until he/she has leveled up. Then collect as many gems as possible and go as far as possible through the stages as you can each time you play.
  13. It takes a long time to collect enough gems and defeat enough monsters to upgrade a hero to level 3. When deciding which heroes to level up to 3, choose carefully based on what stat boost the hero will get at level 3 , then focus only on that hero until you've leveled him or her up. The stat boost that the hero gets will make it easier to progress to the advanced stages, which means that you will be able to defeat lots of enemies in a short amount of time, which means that it might take less time to level up your next hero.
  14. You can get free tokens by watching advertisement videos. You can do this by going to the shop and tapping Get Gems and Tokens in the bottom right corner, then tap Free Tokens under the tokens tab. You can also see this screen if you have no tokens and try to purchase something that requires tokens, then tap the get tokens button. Just wait for the video to be over, look for the X button to close the video (sometimes you have to wait for it to appear), and then you will get your free token. Be aware that the number of free token offers per day is limited, so sometimes the game will tell you that there aren't any free token offers right now.

Want to be involved in creating a mobile phone MMORPG? Check out my other blog here

Nimble Quest Game Stages

Want to be involved in creating a mobile phone game? Check out my other blog here

The Stages

Nimble Quest progresses in stages. After you defeat a specific number of enemies, you will progress to the next stage.

A stage takes place in a playing field where random monsters walk around trying to attack your heroes. To clear the stage, you must defeat all of the monsters. There are seven different playing fields:
  1. Forest
  2. Graveyard
  3. Sewer
  4. Courtyard
  5. Castle
  6. Dungeon
  7. The Depths
After you pass The Depths, the playing fields repeat. Each stage name is followed by a number, so the first time you do the Forest stage, it is called Forest 1. After The Depths 1, you move on to Forest 2, Graveyard 2, and so on.

Number of Enemies to Clear Stage

Use the following formula to determine how many enemies you must defeat to clear the stage. Stage number refers to the number of stages that have been started so far, e.g. Sewer 1 is stage 3 and Forest 2 is stage 8.
enemies to clear current stage = (stage number) * 15

Cumulative Number of Enemies to Clear Stage

Note that the number of defeated enemies shown in the corner is cumulative. To calculate the cumulative number of enemies that you have to defeat to clear a certain stage, use the following formula:
cumulative enemy total to clear current stage = 7.5 * [ (stage number) 2 + (stage number) ]

Enemy Types in Each Playing Field

Each playing field has a specific set of monsters that can be found there. They are listed below.
  • Forest - Black Spiders, Green Spiders, Knights, Archers
  • Graveyard - Zombies, Black Spiders, Green Spiders, Bats, Skeletons
  • Sewer - Bats, Rats, Skeletons, Black Spiders, Green Spiders
  • Courtyard - Healers, Archers, Red Knights, Knights, Rats
  • Castle - Knights, Red Knights, Healers, Fire Mage
  • Dungeon - Skeletons, Healers, Black Spiders, Fire Mages, Green Spiders
  • The Depths - Demons, Fire Bats, Fire Spiders, Fire Mages, Healers, Skeletons

Want to be involved in creating a mobile phone game? Check out my other blog here

Nimble Quest- Heroes

Want to be involved in creating a mobile phone MMORPG? Check out my other blog here

Heroes

Each hero of Nimble Quest has different abilities, different armor, attack strength, attack speed, and so on. Heroes start at level 0, can be leveled up to a maximum level of 3, and on each level up, the hero gets a stat boost that improves his or her performance or gives that hero a special ability. This page lists all of the details on each hero.

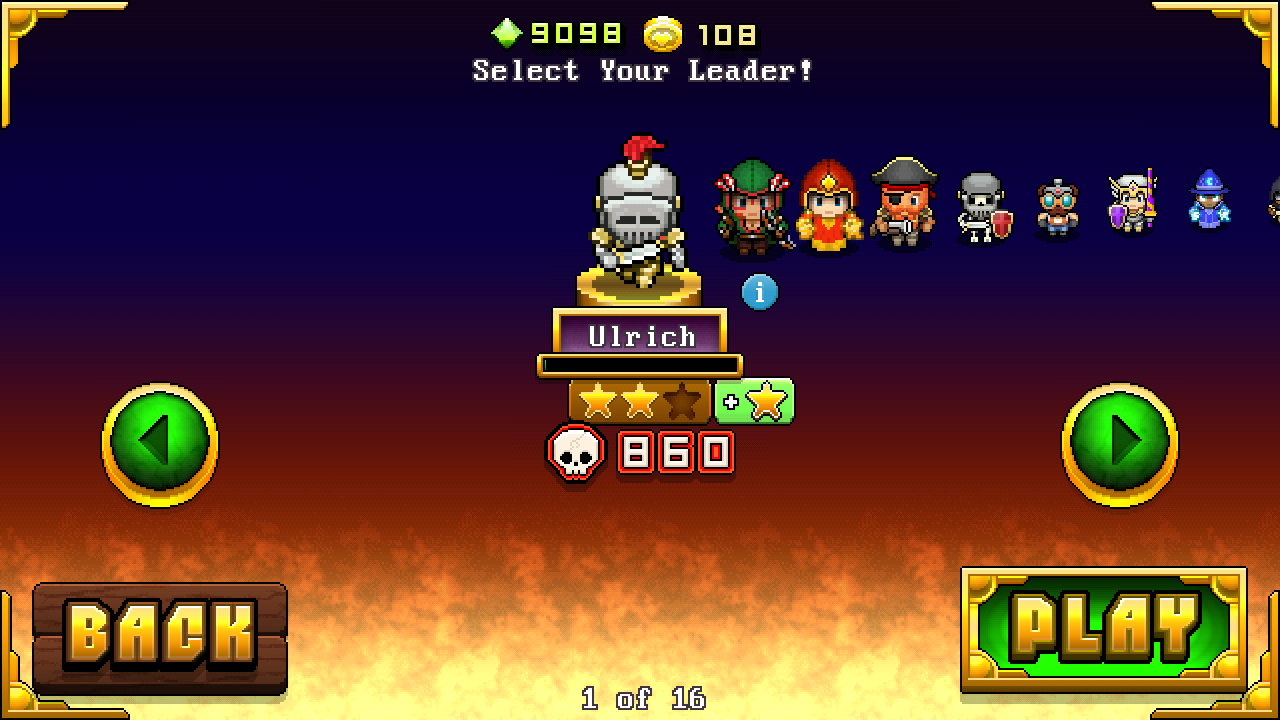
Ulrich

Ulrich is described as an outcast knight. He has a short sword and heavy armor.
  • Ulrich's Level 1 Bonus: +25% Attack Rate (can shoot another arrow 25% sooner)
  • Ulrich's Level 2 Bonus: +25% Armor (takes 25% less damage from attacks)
  • Ulrich's Level 3 Bonus: +50% Armor (takes 50% less damage from attacks)

Ulrich's Appearance Changes on Level Up

  1. Shoulder armor becomes golden
  2. Leg armor and helmet details become golden
  3. Face shield becomes golden

Merida

Merida is an archer with light armor.
  • Merida's Level 1 Bonus: +25% Arrow Speed (her arrows move 25% more quickly)
  • Merida's Level 2 Bonus: +50% Armor (takes 50% less damage from attacks)
  • Merida's Level 3 Bonus: +100% Attack Range (she can shoot enemies from twice as far away)

Merida's Appearance Changes on Level Up

  1. Gains feathers on hood
  2. Gains metal belt buckle and metal details on wrists and bow
  3. ?

Blaze

Blaze is a lightly armored fire mage who shoots exploding fireballs.
  • Blaze's Level 1 Bonus: +25% Attack Rate (can shoot another fireball 25% sooner)
  • Blaze's Level 2 Bonus: +50% Armor (takes 50% less damage from attacks)
  • Blaze's Level 3 Bonus: +50% Attack Range (can shoot enemies from slightly farther away)

Blaze's Appearance Changes on Level Up

  1. Gains gold edges on cloak
  2. Gains gold diamond on hood
  3. ?

Boomey

Boomey is a pirate with medium armor who shoots a musket.
  • Boomey's Level 1 Bonus: +50% Attack Range (can shoot enemies from slightly farther away)
  • Boomey's Level 2 Bonus: +50% Attack Damage (his bullets do slightly more damage to enemies)
  • Boomey's Level 3 Bonus: +50% Bullet Speed (his bullets move 50% more quickly)

Boomey's Appearance Changes on Level Up

  1. Gains red bandana
  2. Gains black pirate hat
  3. ?

Bones

Bones is a skeleton knight with light armor and a long sword.
  • Bones's Level 1 Bonus: +50% Armor (he takes 50% less damage from attacks)
  • Bones's Level 2 Bonus: +25% Attack Damage (his attacks cause slightly more damage)
  • Bones's Level 3 Bonus: +50% Attack Rate (he can swing his sword again 50% sooner)

Bones's Appearance Changes on Level Up

  1. Shield becomes red with a cross
  2. Helmet gains face guard
  3. ?

Gizmo

Gizmo is a gnome who throws bombs and has light armor.
  • Gizmo's Level 1 Bonus: +25% Blast Radius (his bomb explosions cause damage to a larger area)
  • Gizmo's Level 2 Bonus: +50% Attack Rate (he can throw another bomb 50% sooner)
  • Gizmo's Level 3 Bonus: Explosion on Death (when he dies, he acts just like a dropped bomb, causing a big explosion that kills all enemies in its radius)

Gizmo's Appearance Changes on Level Up

  1. Gains black gloves
  2. Gains metal part on goggles
  3. Right goggle lens becomes larger, green with crosshair

Uther

Uther wields a lance and has heavy armor. His lance causes damage straight ahead.
  • Uther's Level 1 Bonus: +25% Attack Rate (he can hit again with his lance 25% sooner)
  • Uther's Level 2 Bonus: +25% Armor (he takes 25% less damage from attacks)
  • Uther's Level 3 Bonus: Heal on Hit (he heals himself a limited amount whenever he (and only he) is hit)

Uther's Appearance Changes on Level Up

  1. Gains gold details on armor, lance, and shield
  2. Gains purple gem on helmet, gold stripes on lance
  3. ?

Arcane

Arcane is a wizard who shoots ball lightning and has very light armor.
  • Arcane's Level 1 Bonus: +50% Armor (he takes 50% less damage from attacks)
  • Arcane's Level 2 Bonus: +50% Attack Range (he can shoot enemies from slightly farther away)
  • Arcane's Level 3 Bonus: +100% Attack Rate (he can shoot another lightning ball 25% sooner)

Arcane's Appearance Changes on Level Up

  1. Moon on hat begins to glow
  2. Cloak and hat become more detailed
  3. Gains a white beard

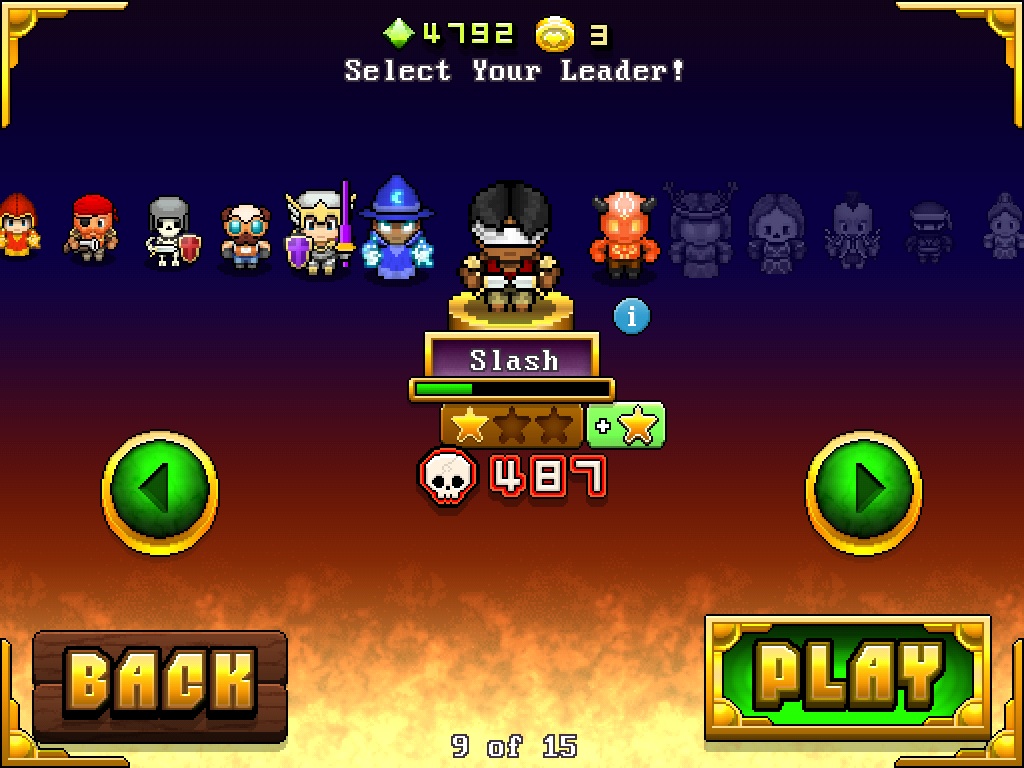
Slash

Slash has a dagger in each hand that he slashes very quickly. He has light armor.
  • Slash's Level 1 Bonus: +50% Armor (he takes 50% less damage from attacks)
  • Slash's Level 2 Bonus: +100% Armor (he takes half as much damage from attacks)
  • Slash's Level 3 Bonus: +50% Attack Damage (his attacks do 50% as much damage)

Slash's Appearance Changes on Level Up

  1. Gains a black cloak with hood
  2. Gains gold details on cloak
  3. ?

Ember

Ember is a demon with medium armor who attacks with a flame shockwave.
  • Ember's Level 1 Bonus: +25% Armor (he takes 25% less damage from attacks)
  • Ember's Level 2 Bonus: +25% Attack Rate (he can use another fire shockwave 25% sooner)
  • Ember's Level 3 Bonus: +25% Attack Damage (his attacks do 25% as much damage)

Ember's Appearance Changes on Level Up

  1. Gains gold details on head and body
  2. Horns get bigger
  3. ?

Faenel

Faenel is a forest spirit who shoots energy balls. She has medium armor.
  • Faenel's Level 1 Bonus: +50% Armor (she takes 50% less damage from attacks)
  • Faenel's Level 2 Bonus: +50% Missile Speed (her energy balls move 50% more quickly)
  • Faenel's Level 3 Bonus: Root on Hit (whenever an enemy hits her (and only her), that enemy, and any enemies following it, will be temporarily frozen in place with roots)

Faenel's Appearance Changes on Level Up

  1. Gains gold circlet
  2. Gains brown antlers/branches
  3. ?

Ezora

Ezora has medium armor and throws bones.
  • Ezora's Level 1 Bonus: +50% Armor (she takes 50% less damage from attacks)
  • Ezora's Level 2 Bonus: +100% Attack Rate (she can throw bones twice as frequently)
  • Ezora's Level 3 Bonus: Heal on Hit (whenever she (and only she) is hit, she heals herself (and only herself) a limited amount)

Ezora's Appearance Changes on Level Up

  1. Gains white gloves
  2. Gains bone crest on back
  3. ?

Gurzog

Gurzog is an orc with heavy armor who swings two axes.
  • Gurzog's Level 1 Bonus: +25% Attack Rate (he can swing his axes 25% more frequently)
  • Gurzog's Level 2 Bonus: +50% Attack Damage (his attacks do 50% more damage)
  • Gurzog's Level 3 Bonus: +50% Armor (he takes 50% less damage from attacks)

Gurzog's Appearance Changes on Level Up

  1. Gains red marks on head
  2. Gains horns
  3. ?

Kishi

Kishi is a lightly armored ninja who throws shuriken.
  • Kishi's Level 1 Bonus: +100% Armor (he takes half as much damage from attacks)
  • Kishi's Level 2 Bonus: +200% Armor (he takes 25% as much damage from attacks)
  • Kishi's Level 3 Bonus: +100% Attack Range (he can throw shuriken from twice as far away)

Kishi's Appearance Changes on Level Up

  1. Gains red headband
  2. Gains white face mask
  3. ?

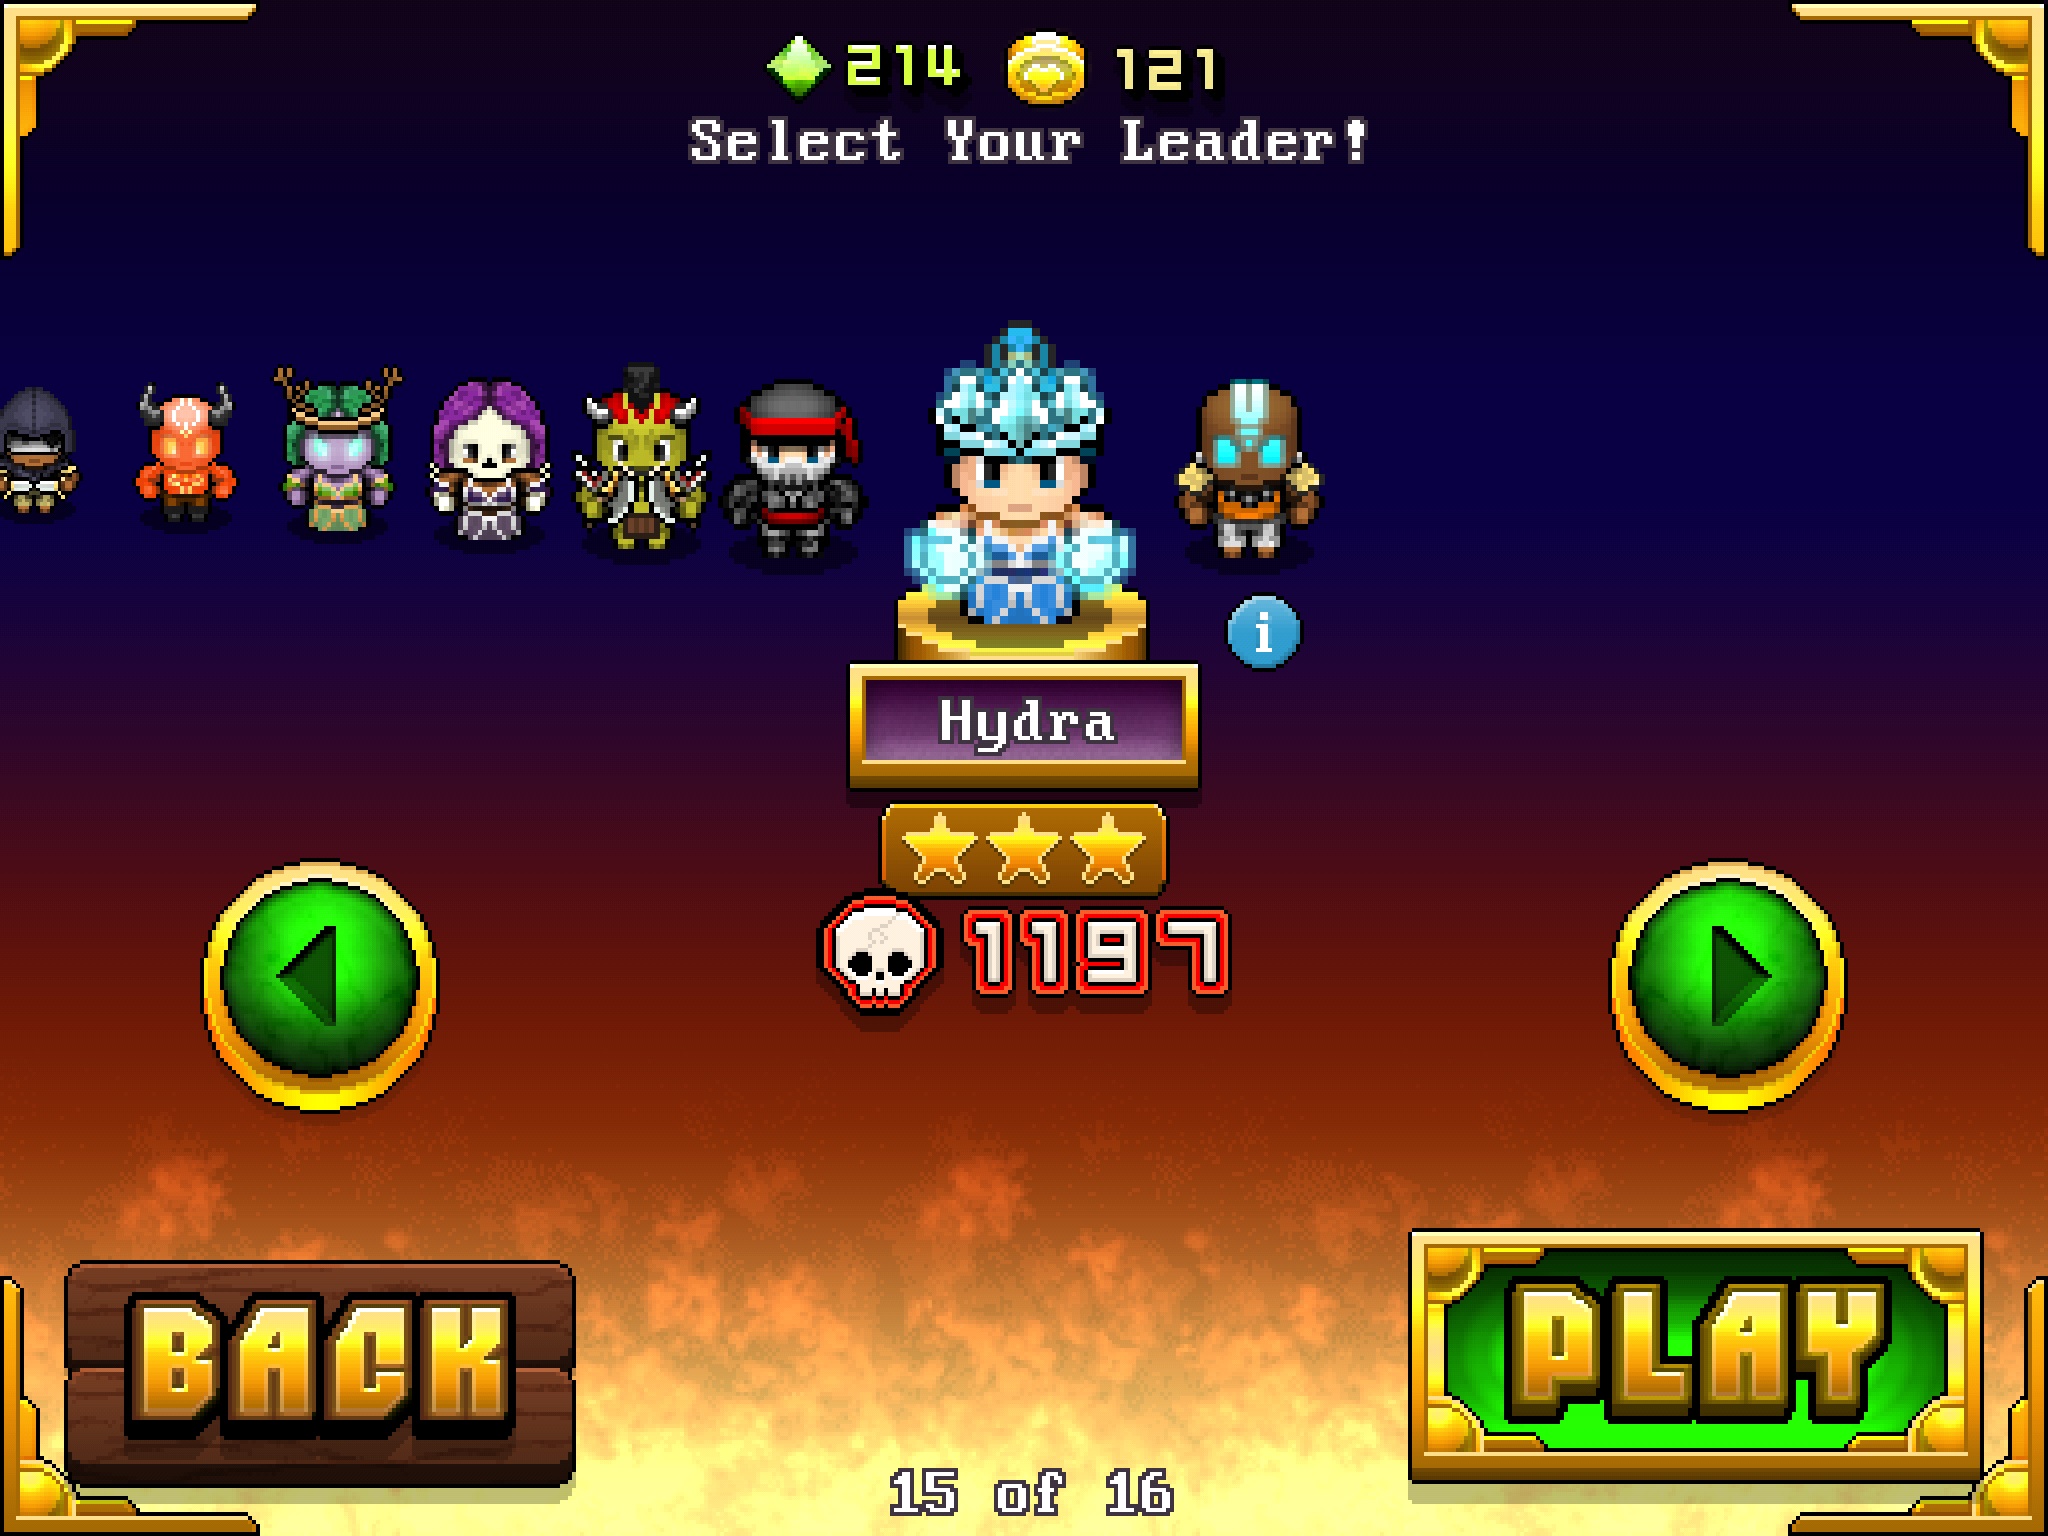
Hydra

Hydra is a princess who shoots bolts of ice and has medium armor.
  • Hydra's Level 1 Bonus: +75% Armor (she takes 75% less damage from attacks)
  • Hydra's Level 2 Bonus: +100% Attack Range (she can shoot ice bolts from twice as far away)
  • Hydra's Level 3 Bonus: Freeze on Hit (whenever an enemy hits her (and only her) that enemy, and any enemies following it, are frozen to the spot with ice)

Hydra's Appearance Changes on Level Up

  1. Gains glowing aura on hands
  2. Gains ice-blue circlet
  3. ?

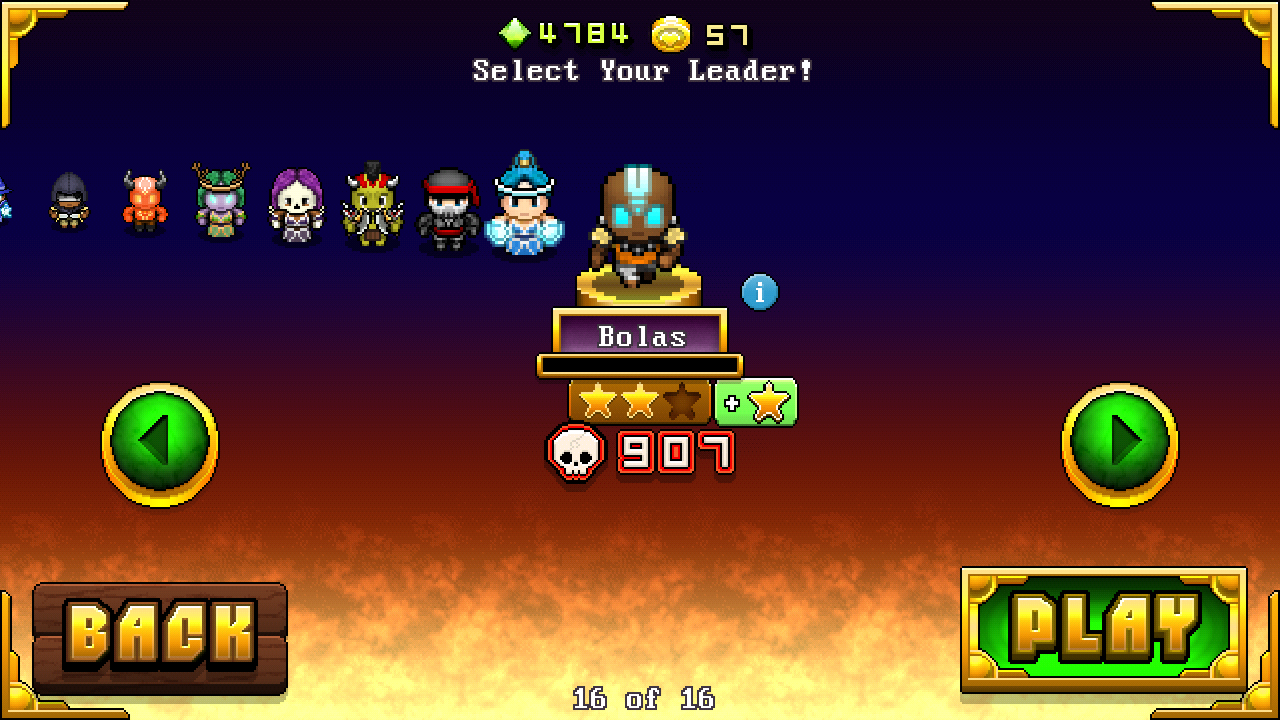
Bolas

Bolas is a monk who shoots spinning, exploding energy. He can only shoot forward. He has light armor.
  • Bolas's Level 1 Bonus: +100% Armor (he takes half as much damage from attacks)
  • Bolas's Level 2 Bonus: +25% Attack Damage (his attacks do 25% more damage)
  • Bolas's Level 3 Bonus: +50% Bullet Speed (his energy balls move 50% more quickly)

Bolas's Appearance Changes on Level Up

  1. Gains golden shoulder armor
  2. Gains glowing eyes and forehead designs
  3. ?

Want to be involved in creating a mobile phone MMORPG? Check out my other blog here
Nimble Quest- Introduction

Want to be involved in creating a mobile phone MMORPG? Check out my other blog here
An Introduction


Nimble Quest is a game for iOS and Android created by NimbleBit (makers of Pocket Frogs, Pocket Planes, Tiny Tower, and many others). Nimble Quest is similar to the game snake, but the snake in Nimble Quest is made up of a line of RPG-pixel style heroes, such as warriors, mages, archers, and so on. Monsters move around the playing field, and if your heroes are close enough, they will attack the monsters. After you defeat a specific number of monsters, you advance to the next level.

For some overall tips to improving your Nimble Quest performance, see the tips page here.

Heroes

As of April 22, 2013, Nimble Quest has 16 heroes. The following list shows the hero's name followed by that hero's attack type. For more details about the heroes, visit the heroes page here.
  • Ulrich - Short Sword
  • Merida - Bow & Arrow
  • Blaze - Exploding Fireball
  • Boomey - Musket
  • Bones - Long Sword
  • Gizmo - Bombs
  • Uther - Lance
  • Arcane - Ball Lightning
  • Slash - Daggers
  • Ember - Fire Shockwave
  • Faenel - Energy Balls
  • Ezora - Bones
  • Gurzog - Axes
  • Kishi - Shuriken
  • Hydra - Ice Bolts
  • Bolas - Exploding Spinning Energy

Stages

The gameplay of Nimble Quest progresses in stages. You advance to the next stage after defeating a specific number of enemies, depending on the stage. The game has the following stages, in this order. After completing The Depths 1, you go to Forest 2, and the stages continue in the same order but with an increased number (Graveyard 2, and so on.) For more information about stages, see the stages page here.
  1. Forest
  2. Graveyard
  3. Sewer
  4. Courtyard
  5. Castle
  6. Dungeon
  7. The Depths

Enemies

In every stage, enemies will randomly spawn in the playing field and wander around attacking your heroes. There are different types of enemies that move at different speeds and have various attack types. The following is a partial list of enemies that you can encounter in Nimble Quest.
  • Black Spider - Slowdown Cobweb
  • Green Spider - Poison Blob
  • Knight - Sword
  • Archer - Bow & Arrow
  • Skeleton - Bone
  • Zombie - Claw
  • Bat - Claw
  • Rat - Claw
  • Red Knight - Lance
  • Healer - Heals Enemies
  • Demon - Fire Shockwave
  • Fire Spider - Lava Blob
  • Fire Bat - Fire Shockwave
  • Fire Mage - Exploding Fireball

Want to be involved in creating a mobile phone MMORPG? Check out my other blog here

Wednesday, August 21, 2013

Clash of Clans- Minion


Want to be involved in creating a mobile phone MMORPG? Check out my other blog here

  • Summary
  • Check out other Dark Elixir Troops here
    • The Minion is a fast, cheap and relatively weak ranged flying unit. Its appearance is that of a flying imp-like creature with large horns, stubby wings and large hands with sharp vicious claws and rubber-like gloves.
    • It is made of Dark Elixir and is trained in the Dark Barracks.
    • The Minion's method of attack is spitting Dark Elixir.
    • Because it is a flying troop, it cannot be attacked by Cannons or Mortars but is very vulnerable to Air Defenses and Air Bombs.
    • Although the Minion does the least damage per second out of all Dark Elixir troops and has the lowest health, it has the fastest training time and lowest housing space.
    • Seeking Air Mines will not target Minions, but regular Air Bombs do.

  • Defensive Strategy
  1. It is really helpful to have an Air Bomb in case you are attacked by Minions. It's the biggest weak spot for a Minion, especially if the attacker has multiple Minions, as Air Bombs do splash damage and can wipe out an entire group at once. For this reason it is helpful to place the Air Bombs near storages/Town Hall.
  2. Defend Air Defenses, Wizard Towers, X-Bows, and Archer Towers well so the Minions don't have free rein.
  3. Minions, although individually weak, are very powerful in large numbers.
  4. Make sure to protect Archer Towers and Air Defenses with a Wizard Tower which does devastating splash damage to hordes of Minions.
  5. If your attacker plans on deploying a large amount of Minions, they will typically try to trigger your Air Bombs first with single Minions deployed at several points around your base (see Offensive Strategy). To counter this, make sure the trigger radius of each Air Bomb is at least behind the first row of defended buildings; this will help ensure that the single Minions will be destroyed by other defenses before they can trigger the Air Bombs.
  6. Minions are useful in the Clan Castle as they can attack both ground and air units for a decent amount of damage, and can only be hit by Dragons, Archers, Wizards and other Minions.

  • Offensive Strategy
  1. It is extremely useful to carry a small amount of Minions (10 or so) to pick off buildings that are defended by ground defenses only (Mortars, Cannons).
  2. Minions are relatively inexpensive and take up only 2 housing spaces, making them well suited to use in a group rush strategy.
  3. Minions can be destroyed by a single Air Bomb; therefore a good strategy is to deploy them one at a time in different locations to set off the Air Bombs, and then follow up by deploying them en masse. Note that you cannot test for Seeking Air Mines in this manner, as these traps do not detect Minions.
  4. As is the case with all flying units, Archer Towers, Wizard Towers and Air Defenses should be taken out before deploying Minions.
  5. Using Giants as a distraction when using Minions to attack other buildings is a good idea since the Giants will attack the defensive buildings and keep them occupied while the Minions attack all the outside buildings achieving at least 50% damage.
  6. Note that while Giants can be used to destroy an Air Defense, they will not occupy its attention while it is being attacked (it will still shoot at your Minions).
  7. Minions can trigger Giant Bombs even though they will not be affected by them! If you suspect a Giant Bombs may be in a certain area, a single Minion is an ideal way to find out, although placing a barbarian would incure a smaller loss (the barbarian would die).
  8. Like Balloons, Minions are exceptionally useful in the Single Player Campaign. You can simply destroy all of the Air Defenses, Archer Towers and Wizard Towers, then deploy a single Minion. It will destroy every building. It takes a bit of patience, but it pays off at the end. With a Single Player Campaign, there is no time limit, so one unthreatened Minion will eventually destroy every building.
  9. Important note: In many cases a single Minion will take enough time to destroy the remaining buildings that your game will time out due to inactivity, which will cause your attack to end prematurely and be unsuccessful (regardless of how many stars you had earned to that point). To prevent this from happening either deploy multiple Minions, move your screen around, or simply change the view every few moments by panning or zooming.
  10. Minions can overpower Air Defenses as they only target one Minion at a time; but beware of Wizard Towers which can vaporize entire swarms of Minions.


  • Upgrade Differences
    • The Minion's appearance changes at every other level.
      • At level 3, the Minion's skin changes from light blue to royal blue, with its horns and forearms a slightly darker shade of blue.
      • At level 5, the Minion's skin turns gray, and its horns and forearms both turn black. The eyes also glow a ghostly white, making it resemble a fully-fledged gargoyle.
      • Check out other Dark Elixir Troops here

Want to be involved in creating a mobile phone MMORPG? Check out my other blog here

Clash of Clans Strategy- Beginners, Advanced & Pros

Want to be involved in creating a mobile phone MMORPG? Check out my other blog here

TIPS

Beginner's Tips

  1. First Timers - Don't worry, your buildings will come back.  You don't have to worry about actually losing anything structural - only gold and elixir.  When you log back onto the game, you'll see that you've been attacked, lots of buildings will be in ruin, and in about 20 seconds, they will have "powered back up" and you're off and running again.
  2. Watch your grid - After you place an item on the screen, you'll see a highlighted area around your village.  This is an area the enemy cannot start within so be sure you don't leave any holes by placing structures too far apart.
  3. The edge won't save you - Building your village close the edge of the screen doesn't stop attackers from starting in the surrounding green area.  You still have to defend from all directions.
  4. Huddle - Build your village close together to take advantage of keeping all things under protection of your weapons. Ensure that you have different types of weapons covering each other in case you're attacked from the ground or the air (e.g., canon = ground, air defense = air, and archers = both.)

Advanced Tips

  1. Power in numbers - Once you've rebuilt your clan castle and joined a clan, be sure to fill it by requesting troop donations before you log off. While soldiers in your army camps are only good for attacking, the troops in the clan castle can also defend your village. When you select the clan castle, you'll see a threshold radius appear (much like with other weapons) that shows you when those troops will be deployed. Take advantage of the extra troops for defense. It's one of the big benefits in being in a good clan.
  2. Sacrifice the Town Hall - If you've already got your third builder and you're not part of one of the top clans, you're probably not that concerned with trophies and are more interested in farming for gold and elixir. By placing the Town Hall outside of your walls you'll make it enticing for attackers to go after it. When they destroy it, it will give them an automatic victory with one star. It will also give you an automatic shield. Your goal here is to protect the gold and elixir storage and not worry about wins and losses. Once you've built a killer base, you can worry about going for the trophies.
  3. 40% destroyed is 100% good - Place non gold and elixir holding (storage, mines, and pumps) outside your walls to allow them to be destroyed. Much like destroying the Town Hall, if the attacker destroys 40% of your buildings, you'll get a longer shield without actually giving up any resources.

Pro Tips

  1. Train your next army - Before you log off, fill up your army camps with an attacking army.  The game used to kill those troops if the base was destroyed during an attack but now they will all survive the attack.  You might as well invest as much elixir into a usable set of troops as you can.
  2. Stock up - Also, once your camps are full, train as many wallbreakers as you can in each barrack.  While they're not the most expensive, they are the most expensive per housing space (i.e., level 5 wallbreaker = 3,000 for 1 housing space so 3k/space and a level 3 P.E.K.K.A = 50,000 for 25 housing spaces, so 2k/space.)  This will take elixir out of play for raiding armies who can only go after your pumps and storage. You can untrain them when you return to get the borrowed elixir back in your storages to spend elsewhere.

Want to be involved in creating a mobile phone MMORPG? Check out my other blog here